Introduction
Requirements
Before we dive in, we want to thank and congratulate you on purchasing one of our items. We're truly appreciative of your support and are fully dedicated to providing you with an outstanding service!
Let's go over the minimum requirements that you will need in order to have a fully functioning site running our theme.
- A Hosting Package (we recommend ASO)
- A copy of WordPress
- An FTP program (Filezilla, Cyberduck etc)
- The theme files that you downloaded from themeforest.net
If you already have a working install of WordPress feel free to skip ahead to theme Installation.
WordPress Install
WordPress provide a fully comprehensive and in depth guide to installation on their codex site.
So instead of going over what's already been outlined there we will simply point you in the direction of the "Famous 5 Minute Install".
YOU CANNOT INSTALL WORDPRESS THEMES ON A WORDPRESS.COM BLOGGING ACCOUNT
It's important to understand that an account on WordPress.com is not the same as a website running a self hosted copy of WordPress.
If you have purchased a theme with this intention you should contact envato support.
Installation
Theme Files
After purchasing Crush, if you chose to download "All files & documentation" your theme folder should have the following files contained within it.
- crush.zip
- crush-child.zip
- licensing (folder)
- democontent.xml
If you chose to download "Installable WordPress file only" you should have the crush.zip archive by itself, which is ready to be installed via the dashboard.
Install via Dashboard
Once you have logged into your WordPress Dashboard, navigate to Appearance > Themes. Click on the Add New button and then from the available options select upload. Navigate to where your files are stored locally and select the crush.zip file then Install Theme.
If the theme was installed successfully you should be met with notifications regarding installing plugins and activating the theme.
Install via FTP
To install the theme via FTP you will need to unzip the the theme archive (crush.zip) somewhere onto your machine. We will assume you have a working FTP program with login credentials as one is needed to install WordPress.
WordPress places it's themes within the /wp-content/themes/ folder. Navigate to this folder within your install and then place the Crush folder within it. You will know this is the correct folder as the default WordPress themes (Twenty Fourteen, Twenty Thirteen) will be here as well.
Once the folder has been uploaded, in your WordPress Dashboard navigate to Appearance > Themes and activate the theme.
Install Plugins
Once the theme has been installed successfully you will be prompted to install the available plugins that came with the theme. Click on "Install Plugins" to get started.
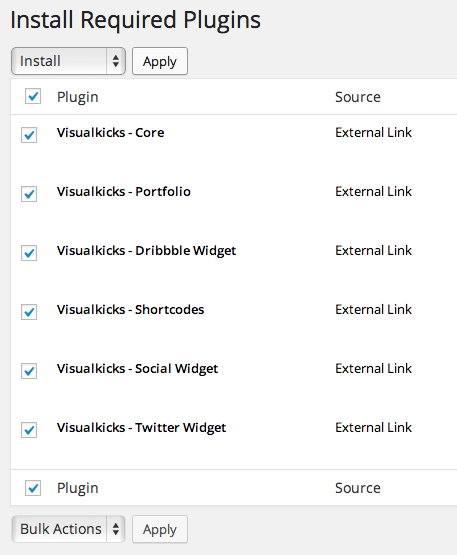
Visualkicks - Core & Visualkicks - Portfolio are both required plugins that MUST be installed. While the remainder of the plugins are not required, we highly recommend you install them as well. We will go over what each plugin does through the course of this guide.
Activate Theme
Now that you have installed the required plugins you're ready to activate the theme via the "Theme Customizer". In your dashboard navigate to Appearance > Customize.
Once the customizer has loaded, open the Theme Activation tab and check the "Activate Theme" checkbox.
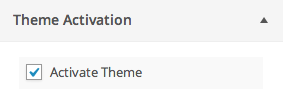
Hit Save & Publish. Once you are notified that the settings were saved, hard refresh the page. You should now have site that looks like the standard demo without all the content.
Site Setup
Demo Content (Optional)
If this is your first time using WordPress we strongly recommend you import the demo content. Importing the demo content will bring in all the portfolio posts, blog posts, menus and pages from our demo, into your site.
To import the demo content navigate to Tools > Import within your dashboard and select WordPress.
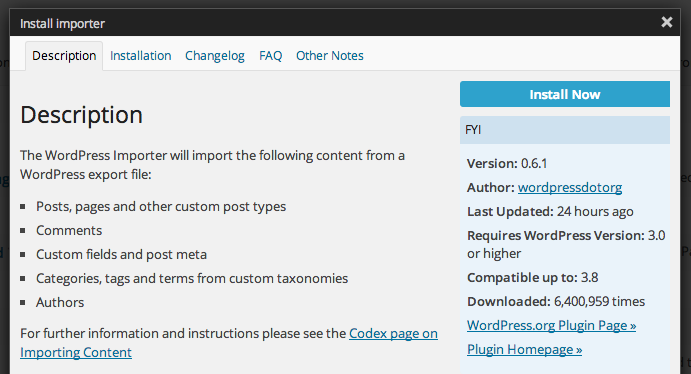
Install, activate and run the importer. Navigate to the democontent.xml file, select it and then hit Upload file and import.
It's very important on the next window that you check the Download and import file attachments. This will download all the demo images, videos and audio files.
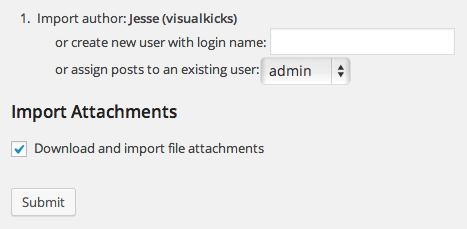
After clicking Submit you may need to wait a few minutes depending on your internet connection as all of the attachments are downloaded from our demo site. Once it's finished you're ready to move onto page setup.
Page Setup
If you've installed the demo content move onto Step 2 of Page Setup, otherwise let's start at step 1.
Step 1 - Page Creation
In order for your site to function correctly we will need to create the following pages
- Portfolio (Work)
- Blog
- Contact (Optional)
It's important to note even if you do NOT want a blog page on your site, you will still need to create a blog page.
To create a page navigate to Pages within your dashboard and click Add New. Give your page a title and then set the page template. The following pages require the following page templates to be set.
- Portfolio - Portfolio page template
- Blog - Default page template
- Contact - Contact page template
Repeat the above process until all 3 pages have been created.
Step 2 - Reading
We now need to change the homepage of the site to your "Work" page. Navigate to Settings > Reading in your dashboard.
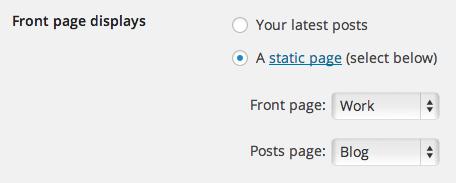
Change the Front Page Displays setting to A static page and make the required adjustments.
Menu Setup
To setup your menu navigate to Appearance > Menus. If you've installed the demo content, 2 menus should be available to select from (select example menu 1). If not create a new menu.
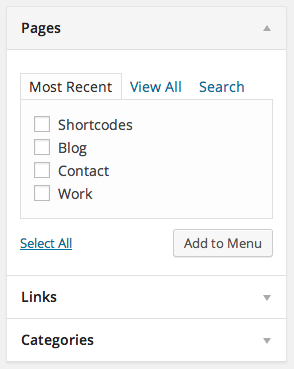
Add the pages that we created previously into the menu (rearrange if needed) and then under the Menu Settings tick Main Menu location.
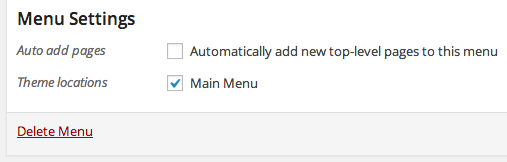
Once that's done hit Save Menu
Permalinks
If you want to change the way your pages and posts are visible in the URL address bar you will need to change your permalinks
Navigate to Settings > Permalinks and select your "Common Settings" option. Typically the most common selection is "Post Name", but feel free to select any of the options available. Click Save Changes and test that your site is still up and running.
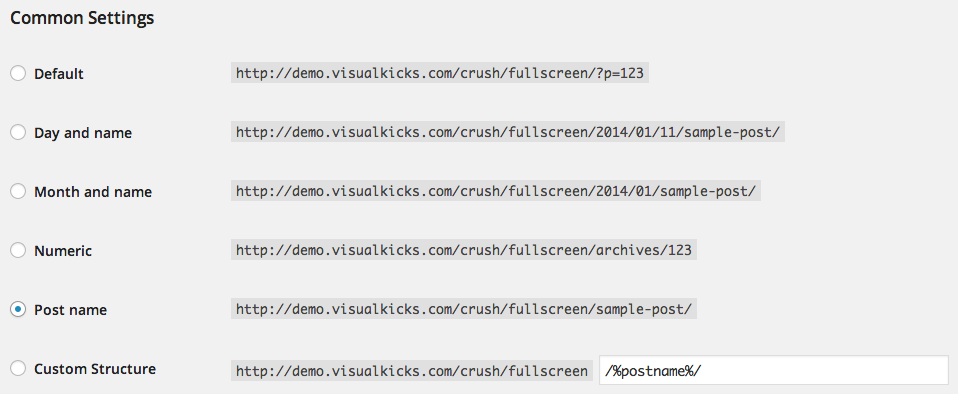
If you experience 404 errors at any time while using your site, you should come back here and re-save your permalinks.
After your settings have been updated your page and post URLs should reflect the changes made.

Analytics & Favicons
Upon installing the Visualkicks - Core plugin, you may have noticed a new page within the theme dashboard called "Theme Settings". Lets navigate to this page and have a look at the options available.
Analytics Tracking Code
If you would like to implement tracking code such as 'Google Analytics', you can copy and paste your code here. This code will appear in the footer of every page of your site.

Favicons & Icons
A favicon is the small icon that appears in the browser url bar. The other image fields are for tablet icons. You should crop your icons to the sizes specified and save them out as .png.

Portfolio Setup
Single Portfolio
If you plan on only having a single page where your portfolio items are featured and have already created the pages mentioned above in Page Setup. You don't have to do anything else. It is however advisable to understand how portfolio Filters work, prior to creating your first portfolio post.
Below is a diagram of how a single portfolio hierarchy would typically look. Notice how we have NOT used portfolio Categories.
- Portfolio Page
- Portfolio Post 1
- Filter Blue
- Filter Red
- Portfolio Post 2
- Filter Blue
- Portfolio Post 3
- Filter Red
- Portfolio Post 1
Multiple Portfolios
If you plan on having more than 1 portfolio page with each page listing different portfolio posts, the below guide will illustrate how to do that.
First lets look at a typical multiple portfolio hierarchy example.
- Portfolio Page 1
- Portfolio Category 1
- Portfolio Post 1
- Portfolio Post 2
- Filter Blue
- Portfolio Post 3
- Portfolio Post 4
- Filter Red
- Portfolio Category 1
- Portfolio Page 2
- Portfolio Category 2
- Portfolio Post 5
- Filter Blue
- Filter Red
- Portfolio Post 6
- Filter Blue
- Portfolio Post 7
- Portfolio Post 8
- Portfolio Post 5
- Portfolio Category 2
When you create a new portfolio page (same method as page setup) after selecting the page template you will be able to select which portfolio category to use.
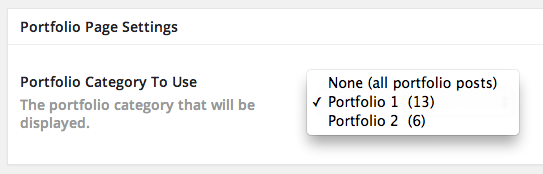
Select a category and publish the page. You will of course need at least 1 portfolio post with the appropriate category assigned to it, or the page will not return any results.
Filters
The filter taxonomy allows for on page portfolio filtering. Any filter that is added to a portfolio post will be displayed on the portfolio page under the menu.
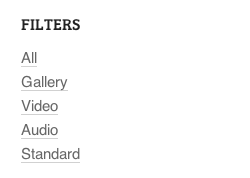
A portfolio post can have as many filters as you choose to give it.
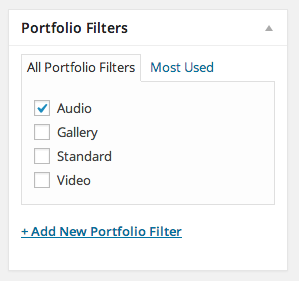
You can manage your filters by navigating to Portfolios > Filters in the dashboard.
Categories
As explained above in the Multiple Portfolios section, the portfolio category taxonomy is used to create multiple portfolio pages. If you have no need for multiple portfolio pages, you can and should ignore this taxonomy.
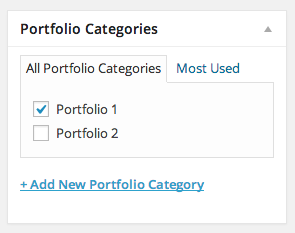
You can manage your categories by navigating to Portfolios > Categories in the dashboard.
Create Portfolio Post
To create a new portfolio post navigate to Portfolios > All Portfolio Posts and click Add New.
Give your portfolio post a title and adjust the permalink if needed.

Set your portfolio posts "Featured Image". All portfolio posts require a featured image to be set. If your featured image isn't appearing correctly, please refer to the images section of this guide.
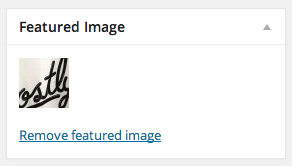
If you want to give your portfolio post a "Post Format" be sure to read the Formats section of this guide.
Let's go ahead and click Publish.
You can always come back and add in content, assign filters and set categories at a later date.
Blog Setup
Blog Settings
The blog is the basis of all WordPress sites, let's go over some of the options for the blog.
Posts Per Page
The posts per page setting controls exactly how many posts should be displayed per page on your blog. This setting is found in Settings > Reading.

Read More Link
In the theme customizer under the Page Blog tab, you will find some options to alter the content trim style. The first of which is the "Read More Link".
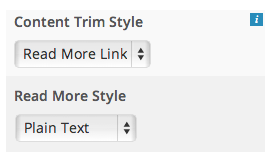
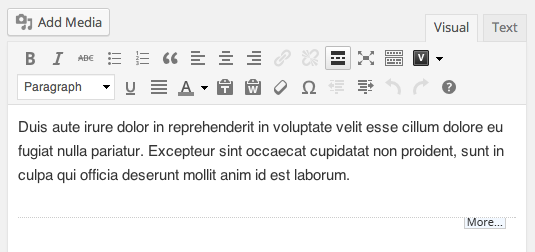
The read more link is a core WordPress feature that allows you to insert a cut off point while editing your posts. This setting is NOT automated. Should you choose this option you will need to remember this every time.
Post Excerpt
Unlike the "Read More Link" the post excerpt IS automated. Within the theme customizer you can set a word count that all posts will be cut off at. If you leave this field blank the default will be set to 25 words.
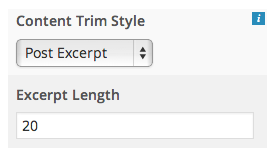
The post excerpt is forcefully used on all archive pages. See the archive settings segment of this guide for more information.
Archives
An archive is any page that lists a group or collection of posts that isn't specifically a page that you have 'created'.
We receive many questions similar to "why is my portfolio page displaying like the blog?". This is because they are viewing their portfolio posts as an archive (a 'custom post type archive' to be precise).
Below is a list of pages that constitute an archive.
- Archive
- A Date (all posts on X date)
- Day
- Month
- Year
- A Taxonomy (all posts in X taxonomy)
- blog tag
- blog category
- portfolio filter
- portfolio category
- An Author (all posts by X author)
- A Custom Post Type (all X posts)
- Search Results
- A Date (all posts on X date)
Your achive page will only ever show a posts title, date, featured image & post excerpt. It will will maintain the aesthetic markup of the blog.
Create Blog Post
To create a new blog post navigate to Posts > All Portfolio Posts and click Add New.
Give your blog post a title and adjust the permalink if needed.
Unlike the portfolio post type, blog posts do NOT require a featured image to be set. Also if you want to give your blog post a "Post Format" be sure to read the Formats section of this guide.
Finally add in some content and if needed, a read more tag to the content window. Now let's Publish the post.
You can always come back and add in content, assign tags and set categories at a later date.
Theme Customization
Customizer Tools
To open the theme customizer navigate to Appearance > Customize.
While we won't go over each individual option within the customizer, we will look at the tools and features that we have implemented in it.

Refresh Button
Sometimes the customizer will require the page to be reloaded. If an option isn't updating you can use the refresh button to force a page refresh.
It's important to note that when you go from page to page within the customizer this is also a form of refreshing the page.
You may also notice that a loading message will appear in the bottom right hand corner during a refresh. A handy hint to let you know that the next page is currently being loaded
H1 Button
This button will highlight all the text tags from H1 through to P. If you're going to alter the default typography settings you will undoubtedly need this on.
Section Button
This button will highlight all the section tags of the site. When you're in the Sidebar or Content tab, you will most likely need this when fine tuning your margins and paddings.
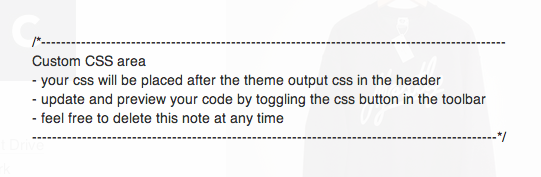
CSS Button
Here you can include any custom CSS you want. This is a great tool for previewing your CSS before it goes live on your site.
Demo Sites & Settings
One of the most commonly asked questions we receive is "How do I make my site look like X version of the demo?".
Truth is there are no set 'versions' of the theme. Just different customization settings that have been applied via the theme customizer (aka no magic button).
If you want to replicate one of the demos we recommend you go to that demo and run Test Drive. This way you can see the exact settings that have been used.
If you open up your site in a new window and copy the settings one for one, in a minute or two you should have an exact replica of the demo site.
Don't forget to copy and paste out any custom CSS that the demo in question is using. You can see the custom CSS but clicking the CSS button in the tool bar.
Post Formats
Gallery Format
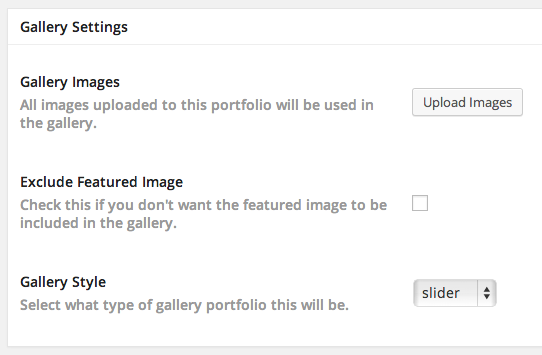
The gallery format allows you to include a set of images on the post page, either as a slider or stacked one on top of the other.
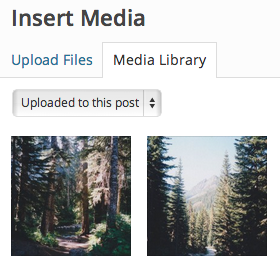
Images will ONLY be included in the gallery post if they are ATTACHED to the post. The easiest way to attach images to a post is to upload them via the Upload Images button shown above. The best way to check what images are attached is to select "uploaded to this post" within the media manager.
Audio Format
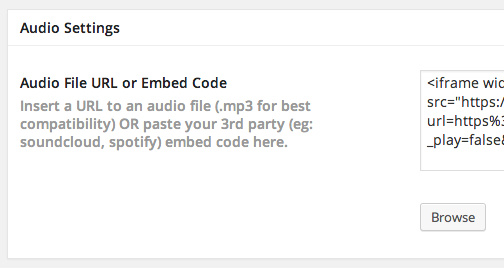
The audio format allows you to include a self hosted .mp3 file or to use an embed code from a site like soundcloud.
If you set a featured image for the post, the player will be positioned over of the image.
We use the built in WordPress media player (mediaelements.js). This means you can add audio players anywhere on the site using the standard WordPress audio shortcode.
[audio src="http://www.example.com/music.mp3"]
Video Format
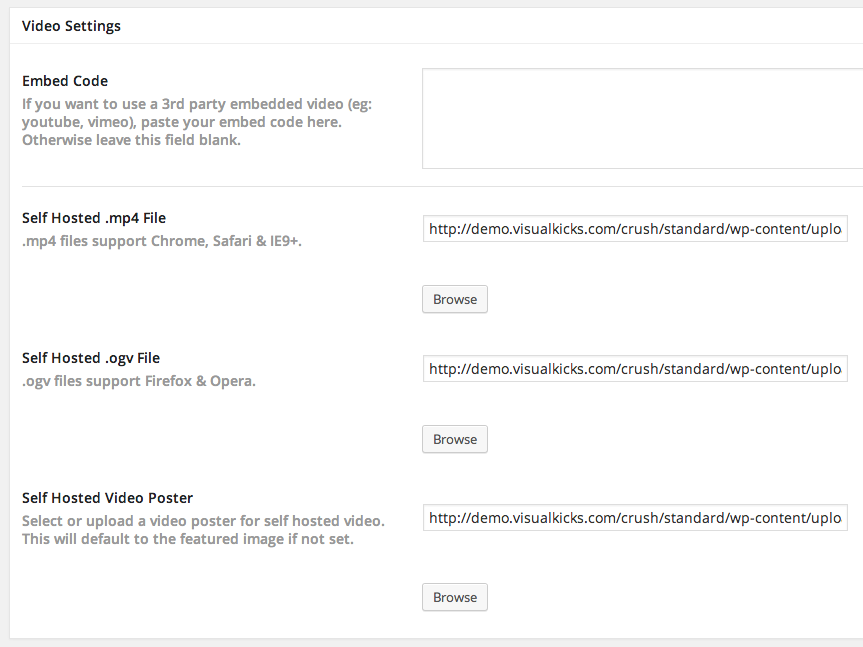
The video format will allow you to include an embedded video (youtube, vimeo etc) or if you prefer a self hosted video. Self hosted videos require BOTH an .mp4 and .ogv file for full cross browser compatability.
If you don't include a video poster for self hosted videos, the featured image will be used instead.
We use the built in WordPress media player (mediaelements.js). This means you can add video players anywhere on the site using the standard WordPress video shortcode.
[video mp4="music.mp4" ogv="music.ogv" poster="poster.jpg" preload="true"]
Link & Quote Format
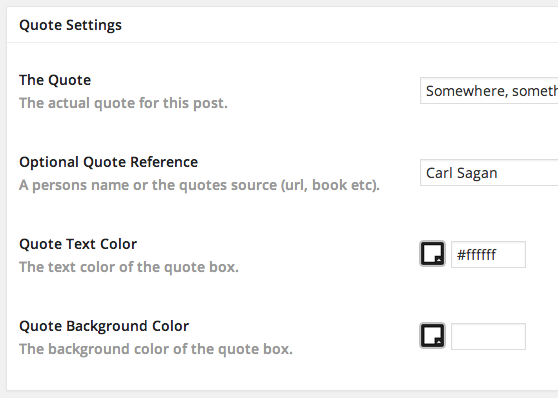
The link and quote formats are more or less the same and are for the most part, self explanatory.
We will however point out if you don't want to set the background color and text color every time, you can set the default values in the theme customizer under the Post Blog tab.
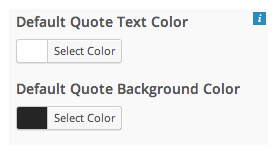
Image Sizes
Depending on the way you have your site layout set up, image sizes may be crucial to take note of.
- Featured Image - Squared
- Must be at least 600px x 600px
- Featured Image - Masonry
- Must be at least 600px in width
- Post Page Images
- Images larger than 1200px wide will be cropped down while images smaller will be scaled up (can produce pixelation on large full screen displays and site setups).
A commonly asked question is "How come when I crop my feature image in the WordPress image editor nothing changes?". This happens because WordPress auto crops new images at designated theme sizes. Those sizes will ALWAYS be used.
If you want to adjust your featured images, you will need to do that BEFORE you upload them.
Plugins & Widgets
Shortcodes
When editing a post or page you can insert shortcodes by using the V button in the tinyMCE editor window. Below is a list of available shortcodes.
- Alerts
- Toggles
- Tabs
- Buttons
- Columns
To see them in action check out the shortcodes page of the demo site.
Don't forget our themes support the native WordPress Audio & Video shortcodes as well.
Sidebars
'Sidebars' are areas in the theme that allow you to add blocks of information called 'widgets'.
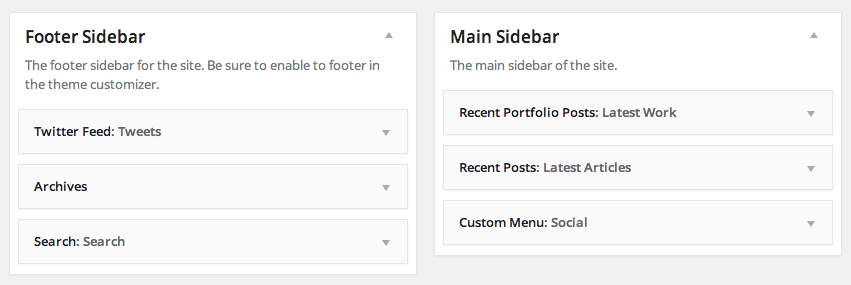
Widgets & sidebars are viewable in Appearance > Widgets. There are two sidebars available with this theme.
Widget - Recent Portfolio Posts
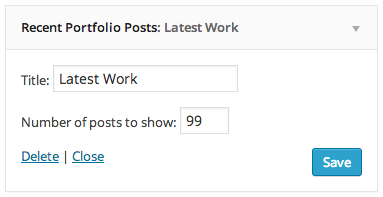
The recent portfolio posts widget comes contained within the "Visualkicks - Portfolio" Plugin. It functions exactly same as the standard "Recent (blog) Posts" widget.
Widget - Twitter Feed
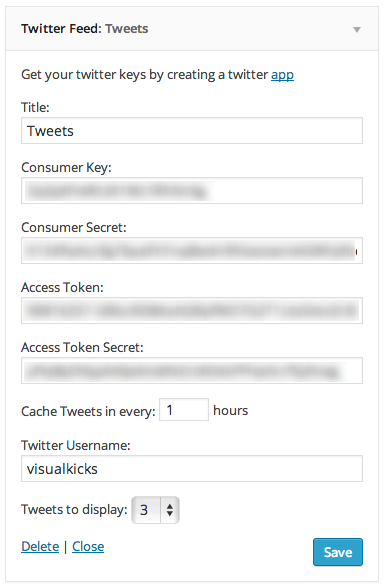
The Twitter Feed widget will require you to create a twitter developer app. You can do this by following the link shown in the image above.
Widget - Dribble Feed
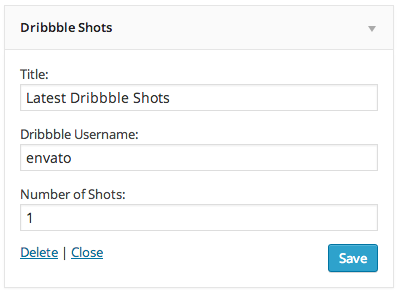
Dribbble is a service that allows designers to show off their work. The Dribbble widget simply displays a set of images from someones dribbble feed.
Widget - Social Icons
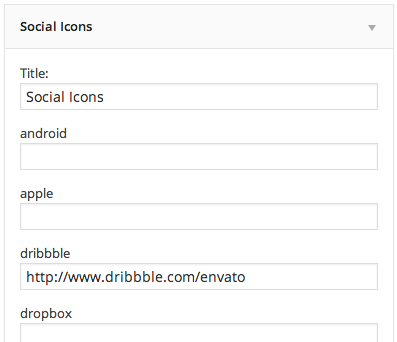
The social icons widget adds links in button form to your social profiles.
This plugin uses FontAwesome and currently FontAwesome does not have an icon for soundcloud. Meaning soundcloud is not supported (yet).